Verity Clothing will soon redirect to Creative Notions

I know that many of you are probably wondering why I seemed to have fallen of the face of the earth.

Let me assuage your worst fears and say that I am alive and well, and I have been working on many projects that I am eager to share with you.

A few months back, I mentioned that I was working on a revamp of this blog that would include a new direction, a new name and a new domain. Well, I am happy to announce that it is finally (sort-of) ready.

My new blog, Creative Notions, is up and running. Please, head on over and take a look, if you are interested. There are several new posts in different categories, and there will be several more over the next few days.

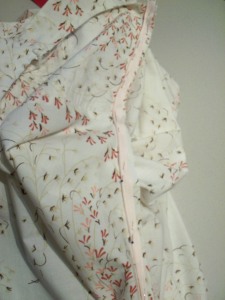
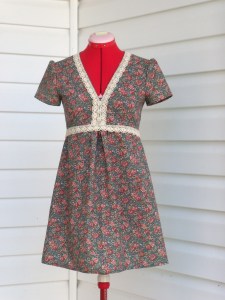
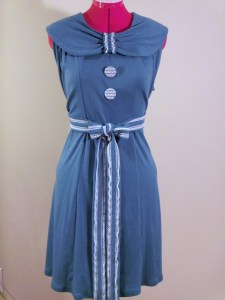
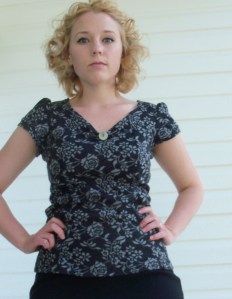
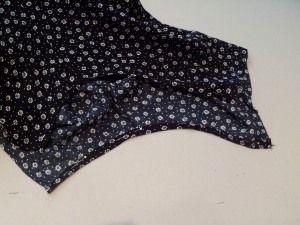
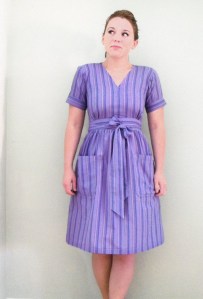
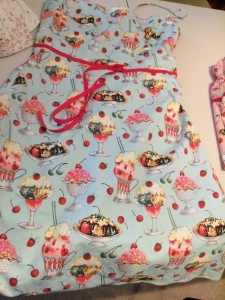
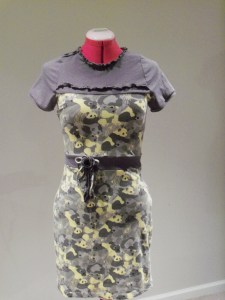
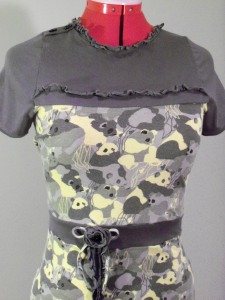
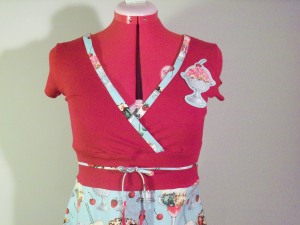
A recent reconstruction-one of the new posts at Creative Notions

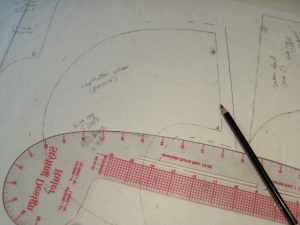
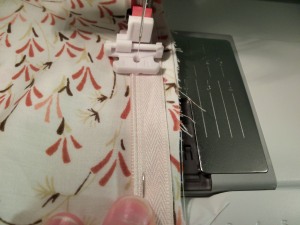
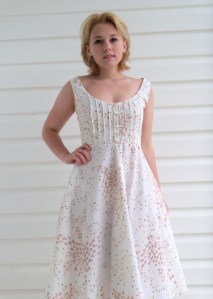
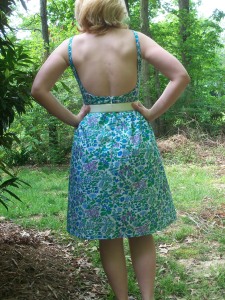
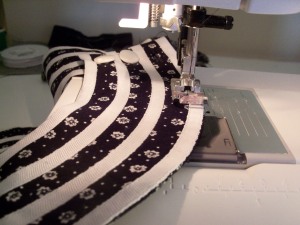
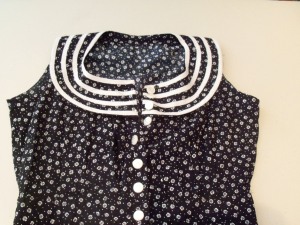
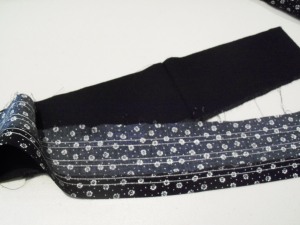
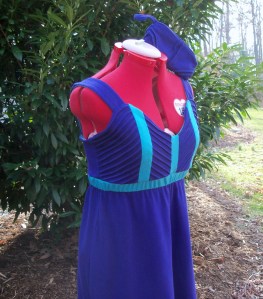
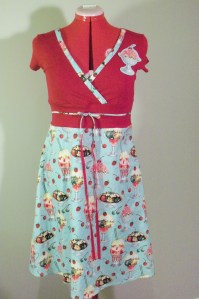
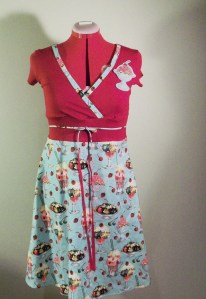
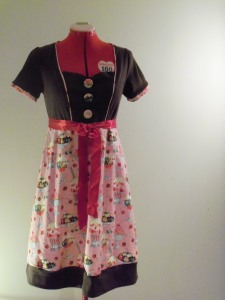
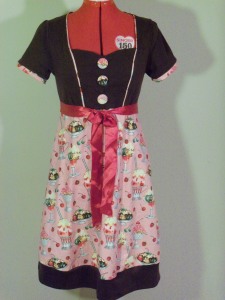
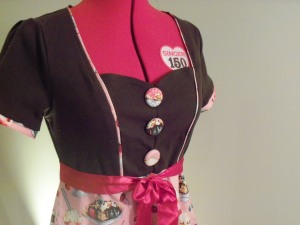
There will be a post within the next few days about this self-drafted open-back sundress

The reasons why I have created this new blog are many. So, I will spare you most of the details, but here is the main reason: Verity Clothing was too sewing specific and closely tied to my clothing line. I wanted to be able to share progress with our home renovations, as well as other creative endeavors. So, rather than have two different blogs, I decided to combine all of my creative interests into this one blog. This move will allow me to post about a variety of creative topics, and therefore, more frequently.

Verity Clothing will soon redirect to Creative Notions permanently. All of the content from Verity Clothing has been moved to Creative Notions. So, readers can still access any old posts they are interested in.

If you would like notification of new posts on Creative Notions, you will need to visit the blog and subscribe through the email subscription form, follow through Google Friend Connect, or subscribe to the RSS Feed.

I hope you will come visit my new blog. See you there!

Posted in clothing, diy, dress, fashion, recycled, sewing | Tagged , , | 1 Comment

The Last Few Weeks

What an eventful few weeks it has been.

My hubby returned. I wrote quite a bit. I finished some custom items, and finished several other projects.

custom item

custom item

I reconstructed this top from a large thrifted double-knit turtleneck shirt. There are princess seams in the front and back.

We ventured to Washington D.C. to see the cherry blossoms, when my sister-in-law visited a few weeks ago.

During a day of exploration a couple weeks ago, I discovered some new thrift and antique stores in the area. I found a very promising source of vintage notions, where I bought the buttons I used for the 40s blouse in my previous post.

To top it all off, I had a very successful day at yard sales two weekends ago.

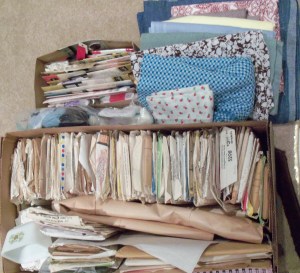
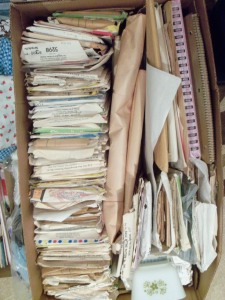
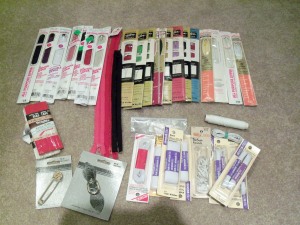
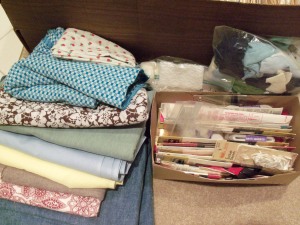
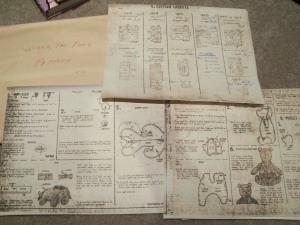
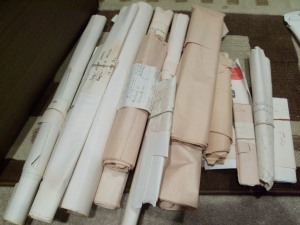
Here is my treasure from last Saturday morning. The box of zippers and lace came from one sale, and the box of patterns and cuts of fabric came from another.

The contents of the zipper box. I cant wait to make a little belt with that leather buckle!

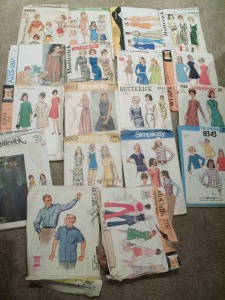
When I saw the patterns peeking out from the box hidden under the table, I squealed like a child who’d just been told they were going to Disneyland. I was visibly shaking with excitement when I opened the box up to find patterns from the 60s and 70s, and not just the typical 80s cast-offs. I have never had the pleasure of finding such a cache at a garage sale. As if that wasn’t enough, there were vintage fabrics as well.

All of the items were purchased for less than $20.

When I got the box home, I discovered more than just patterns.

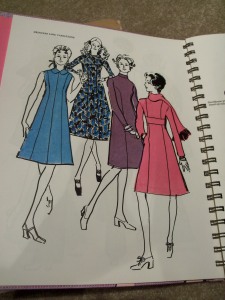
One of the drawings in the pattern drafting and dressmaking book

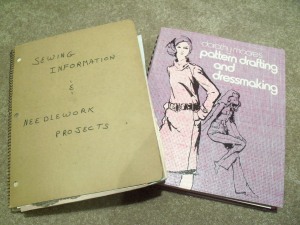
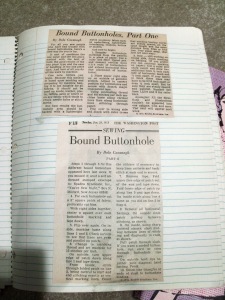
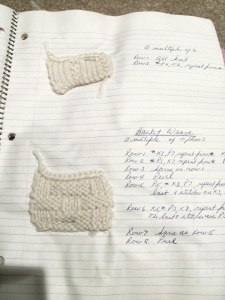
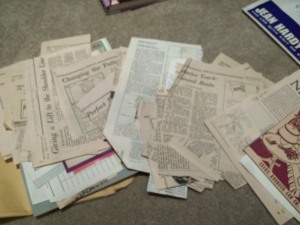
There was a journal with a collection of sewing tips clipped from newspapers, and knitting patterns with little sample squares to go with them.

The box is a treasure trove.

There are several old patterns for making stuffed toys. These ones are for Winnie the Pooh characters.

These patterns are either self-drafted or traced. They are mostly for childrens clothing, which will come in handy one day.

There was a large amount of loose clippings from newspapers and magazines, with all manner of sewing tips and techniques.

I am really upset with myself for not establishing contact with the woman I bought these from. She said that some of the patterns were ones that her mother used to make clothes for her and her brother, and some of them she used to make clothes for her daughter. I would love to spend time talking with her about the memories that go along with the sewing patterns, and writing about the history behind them. It would be wonderful to tell her story.

I may have to go back and try to find her house. I’m sure I could learn so much from her, and I love listening to stories of those who have lived longer and are much wiser than me. I think it would be so much fun to put together the stories of seamstresses throughout the decades, telling their story through the lens of their shared love of sewing, reflecting on the place of sewing throughout recent history and how it affected their lives. Quite a daunting task I must admit, but worth it.

Here’s a sampling of some of the patterns in the box.

I also went to G Street Fabrics recently, because my husband and I went up to Baltimore this past weekend. On the way home, we went through the D.C. area, so I could check out one of the G Street Fabric stores. I went to the Rockville, MD location (there are two others in Virginia).

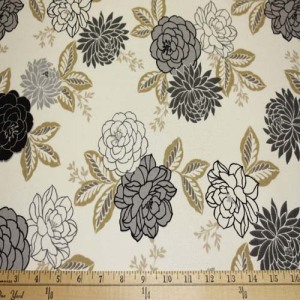
The store was overwhelming and exhilarating at the same time. The prices are a little high on some things, and they have some really high quality and designer fabrics. It’s possible to find some very nice fabrics in their clearance sections, if you know what you’re looking for. The store also has a huge selection of buttons and notions. I’ll undoubtedly be back once we are in our house and working on décor, etc. I found one upholstery fabric that I am pretty intent on having.

The picture doesn’t do the fabric much justice. It is much prettier in person.

Can’t you just see a cute little chair re-upholstered in this material, or some pillows, or maybe even the cushions of dining room chairs?

Speaking of our house, there are still some uncertainties. So far, we are still set to close on April 29th. However, some things have come up with a lender required roof certification. The roof can’t be certified until it is re-shingled. So, we’re now waiting to hear from the seller about our next step. I’ll continue the updates when we know more.

Posted in fabric, pattern, retro, sewing, vintage | Tagged , , , , , , | 8 Comments

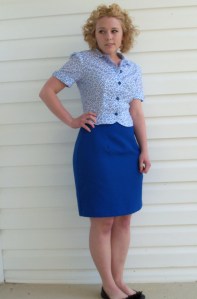
40’s Blouse and Reconstructed Skirt

It has been an exciting few weeks. I will provide more details in a few days, but first I’d like to share a completed project.

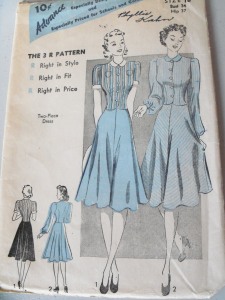
Remember many months ago when I mentioned making a blouse with this 1940’s pattern?

Well, I finally found the right fabric at the thrift store and got up the courage to use the pattern.

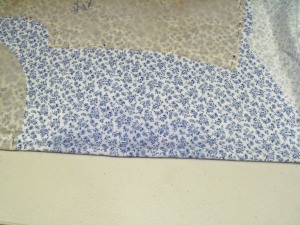
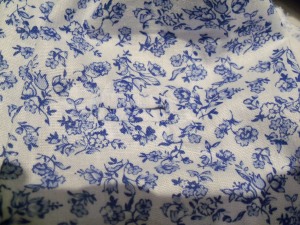
I picked this bit of fabric up for less than $1. There were some discolored sections along the fold, but I figured I could work around them.

I had to dig to the bottom of a bin to retrieve this material. Finding things like this is what makes me never skip rifling through bins of linens at thrift stores. You really never know when you’ll hit the jackpot.

Anyway, I set to work carefully cutting out my pieces. Then I sewed the sides and shoulders together, as well as all of the darts.

I decided to follow most of what the pattern told me to do, including bound buttonholes.

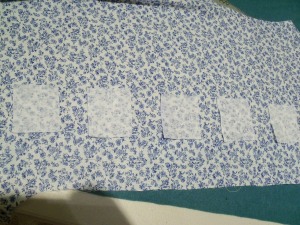
Here is the bound buttonhole process in pictures:

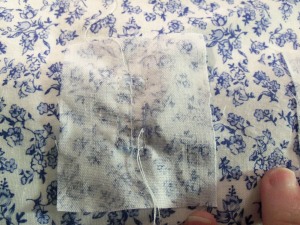
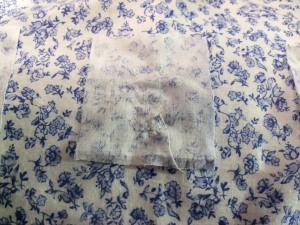
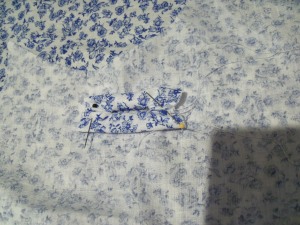
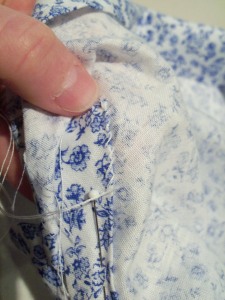
I basted squares to the right side of the buttonhole area, on the right front of the blouse. I sewed the line according to the markings on the pattern that signified the center of the buttonholes.

I sewed a quarter inch on either side of the basting line and around the sides at the pattern markings.

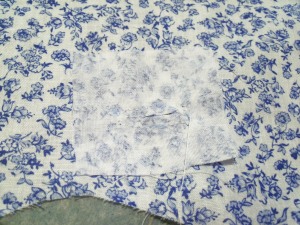
I removed the basting stitch from the middle of the stitched rectangle.


The next step was slashing a hole where the basting stitch was, and clipping in a triangle shape at the corners.

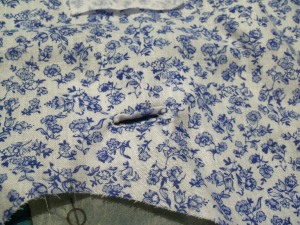
Then, I pulled the fabric square through the hole.

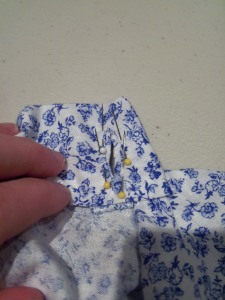
I temporarily pinned the buttonhole in place on the inside of the blouse.

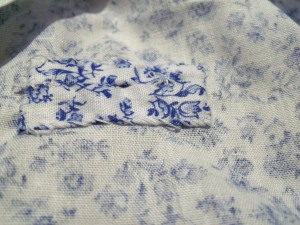
Here is how one of the bound buttonholes looked after the two lips were sewn together at the buttonhole edges, and the whole fabric square folded under and hand-stitched down around the edges.

After the collar was sewn on, I had to turn the self-facings in, cut where the facings corresponded with the buttonholes, turn the edges under, and hand-stitch the self facing to the buttonhole edges.

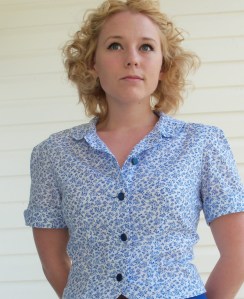
Here is what the buttonholes generally look like from the right side.

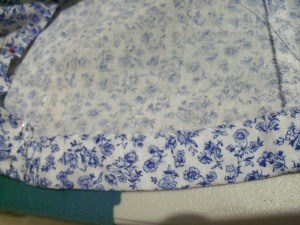
After I sewed the collar to the shirt, I hand-stitched the bias strip down. For the bias strip I used a section of the fabric that was discolored since it would be on the inside of the blouse.

The inside of the sleeves at the cuffs called for bias strips as well, but I just stitched the seam allowance down on the inside. I sewed the sleeves to the blouse, and hand-stitched the hem of the blouse.

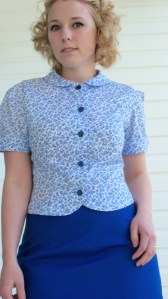
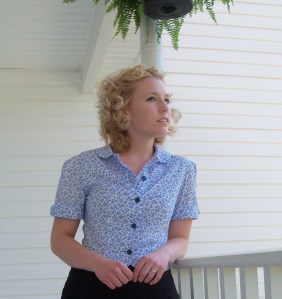
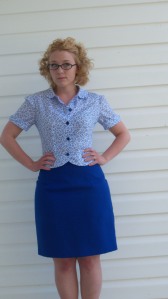
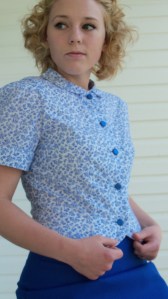
I used some blue buttons from an antique store that I just found last week. I think they may have cost about 50 cents or less. The prices were very reasonable.

This blouse required a lot of hand-stitching, which I am not usually excited about. I did the majority of the stitching carefully enough that the stitches aren’t visible on the outside of the blouse. It turned out so pretty that I think I’ll be doing more hand-stitching in the future. It just looks so clean and neat without stitches showing everywhere.

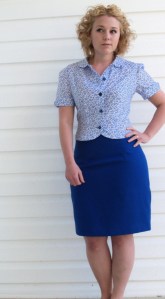
I made a blue skirt to go with the top from a thrifted 80s sheath dress. For some reason I’m missing the before picture of the dress, but it’s not important.

For the pictures of the outfit, I decided to do my hair in pin curls.

Oh yeah, and I got new glasses.

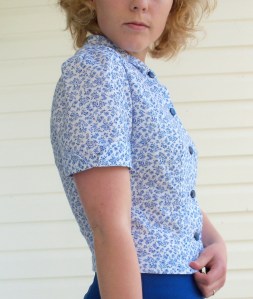
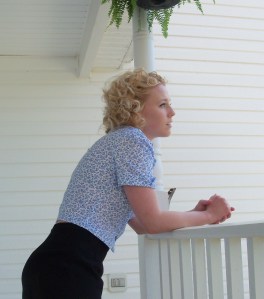
Here are the pictures of the outfit.

If I make this blouse again, I will probably take the blouse in just a tad, and make the sleeves a little bit smaller.

I think I’d like to make a pair of high-waisted capris and a pair of shorts that would work with this top.

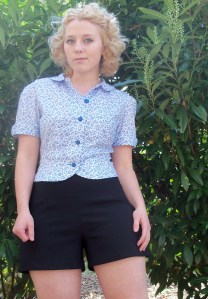
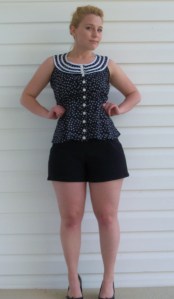
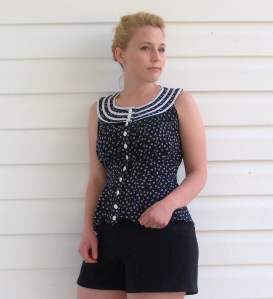
I did take some pictures with my black shorts.

Posted in blouse, clothing, diy, retro, sewing, vintage | Tagged , , , , , , , , , , , , | 16 Comments

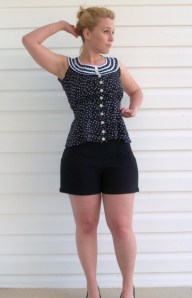
Summer Reverie Blouse and Shorts

I’m sorry that I neglected to post earlier this week. My husband is gone for the week, and I’ve discovered that I’m not as productive when he’s gone. I start to miss him too much, and I have difficulty staying on task. ;P

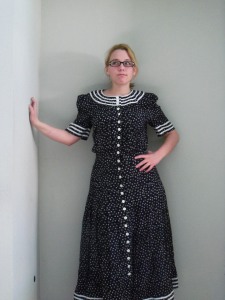
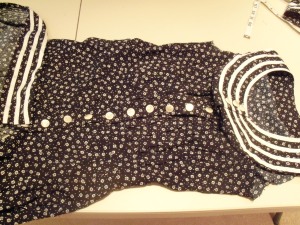
I have managed to completed another reconstruction. It began as this immeasurably dowdy dress.

I purchased this dress many months back and just got around to refashioning it.

My original idea was to make a new dress out of it, but I thought about it a while longer, and was inspired to create a blouse.

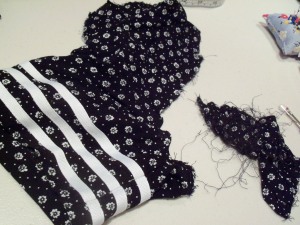
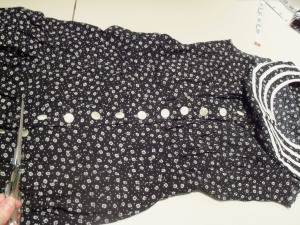
I began the process by, removing the shoulder pads. Shoulder pad removal is usually a given for each of my reconstructions, but I also removed the sleeves.

At first I thought I would reshape the sleeves, but changed my mind as I was looking at the dress and determining my plan of attack.

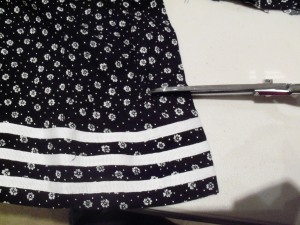
I cut the bottom half of the dress off at the lower hip region, and removed some of the section of trim along the bottom of the skirt.

My intention was to add the trim around the bottom of my new top, but I later decided it looked better without it (I don’t need horizontal stripes around my hips!).

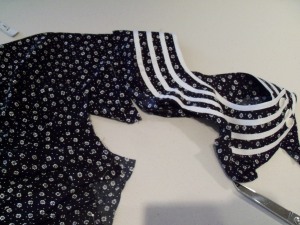
The bodice of the dress needed to be shortened from the top, underneath the collar. I knew that shortening it that way would bring the waist up, remove some of the excess blousy material and adjust the armholes.

So, I completely removed the collar portion and finished the edge.

I also measured and restructured the neckline that would attach to the bottom of the collar, and finished the edges of the bottom half of the new armholes.

Then, I sewed the collar and the rest of the top together, and hemmed the bottom of my new blouse.

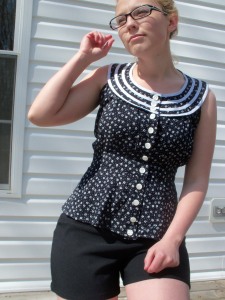
Using some of the trim from the bottom of the skirt and some black material, I created a matching belt.

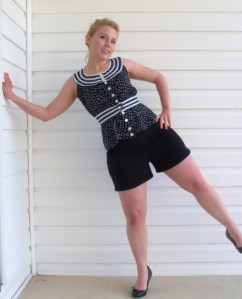
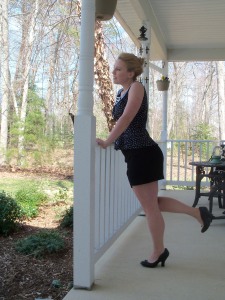
I made a pair of shorts to pair with the top, using a black, stretch suiting, fabric remnant. I had a vintage pattern for shorts in my stash. It was a little too small and required some adjusting, but I’m happy with the result. Originally, the pattern called for a side zipper, but the material was so stretchy that I ended up just omitting the zipper.

This particular pattern re-drafting seemed to require more math than usual. I was provoked to thought by Gertie’s blog post a few weeks back about sewing and math. I too, have been intrigued by the way that sewing tends to draw both right-brained and left-brained people. There aren’t very many activities that people with completely different minds, like writers and engineers, can share a common interest in.

I have always disliked math. My dad is a computer science engineer with a Master’s degree in Math. So, you can imagine how dismayed he would get when I declared my hatred of the subject on numerous occasions.

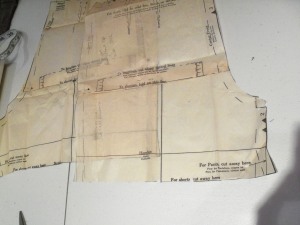
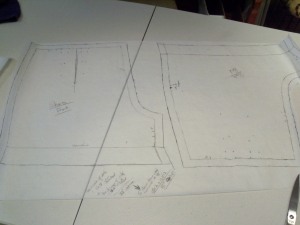
But even I cannot deny the necessity of basic math when constructing garments. Below is a picture of what my re-drafted pattern looked like. You can see some of my illegible math scribbles on the bottom of the sheet of tracing paper. I still wound up needing to adjust some areas of the pattern after trying on a muslin of the shorts.

My hips were a bit wider than the pattern, and my waist was a bit smaller. I also had to fit the leg holes to the measurement around my thigh. Fractions are a major part of drafting and fitting patterns. Math lessons that dealt with fractions were always the most difficult for me. So, I am always amazed at my ability to put aside my loathing of fractions when it is a necessary component of something that I love doing.

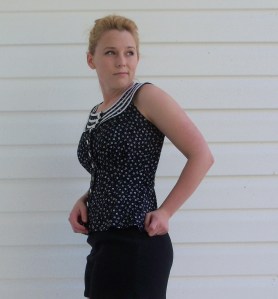
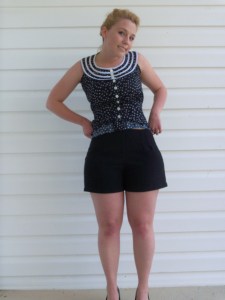
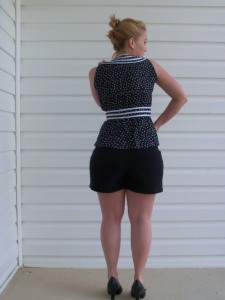
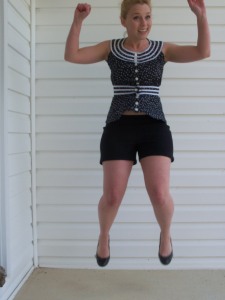
Once the shorts were finished, my black and white ensemble was complete.

It is such a fun little combination.

There is definitely a retro panache to the outfit, is there not?

At first, I really wanted to make a pair of white shorts to go with the top. I thought it would be an even better look, but I can’t really pull off white shorts (especially right after winter). I don’t really like to wear shorts at all, but they seemed like the appropriate thing to wear with this blouse.

I like the way the shorts came out. The fit is really comfortable, and they’ll be a versatile addition to my wardrobe.

You must forgive my white legs. I’m working on it. ;o

I have had one opportunity in the past few weeks when it was warm enough that I could lie outside to get a little bit of sun. I enjoyed a peaceful forty-five minutes, or so. It was disrupted by a bug that sounded like a low-flying plane came humming around my little spot on the deck. I wasn’t around much longer because he refused to leave the area. I do not share space with anything that buzzes. Honestly, I refuse to remain in the vicinity of any type of bug. That bug phobia may be problematic when we finally get the keys to and start cleaning up our new house: there are bugs all over the place. Eek!

I can’t wait to wear this on a summer picnic with my husband. 🙂

It would be perfect for a day out on a boat. Maybe we’ll rent one at some point this summer.

I probably shouldn’t be dreaming about summer already, but spring hasn’t provided very many warm days yet. I was pretty cold while taking the pictures of this outfit (it was probably in the 40s). So, I can at least imagine it’s warm.

In other news:

I am working on a complete revamping of this blog. It will have a new name and a broader direction. It will be more about life as a whole, and how sewing intersects with my life and with my writing. I will share writing, sewing and any other things I fancy. A subsection of the blog will be about the process of renovating a home. It will follow the exploits of “a seamstress and a handyman” (me and my husband) as we foray into the field of home renovation.

Oh yeah, and for those interested, I have an update on the house. We were finally able to have the home inspection, and we have decided to move forward. So, Lord willing, we should be moving into our house by the end of April at the latest.

Posted in blouse, clothing, diy, dress, fashion, recycled, redo, repurposed, retro, sewing, shirt, thrifted, upcycled, vintage | Tagged , , , , , , , , , , , , , | 26 Comments

Japan Quake Appeal Raffle Winner

Thank you to everyone who participated in the raffle for disaster relief. I used random.org to generate a random winner. Every $5 donated earned entrants a ticket corresponding with a number in order from 1-12. If there wasn’t an amount mentioned in the comment, I counted it as one ticket.

And the winner is:

This means that Julie is the winner.

Congratulations! I’ll send you an email to discuss which option you’d like, and shipping information.

Thanks again to all who participated. I encourage everyone to continue their prayers and support for the victims of the Pacific earthquake and tsunami.

Posted in giveaway | Leave a comment

Raffle Update – Two Choices

Since I haven’t gotten any response to the raffle, I’m hoping that offering a choice might generate some donations. I realized that I should have offered something besides an item of clothing to appeal to a wider range of people.

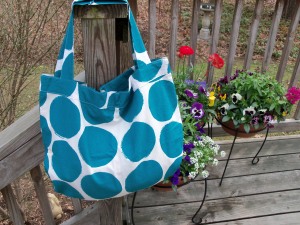
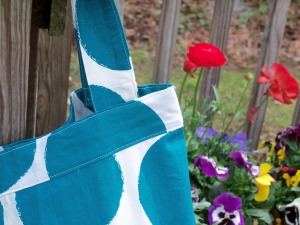
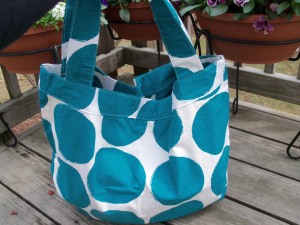
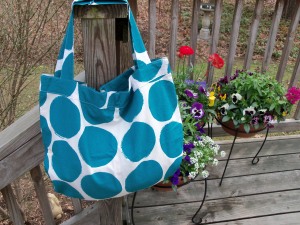
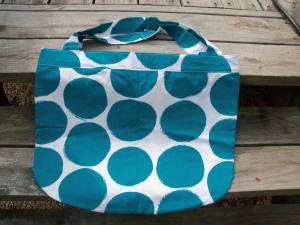
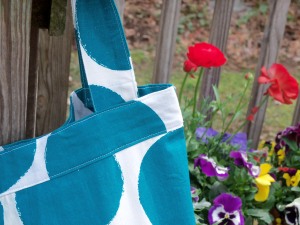
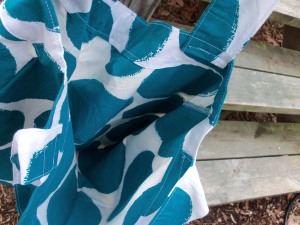
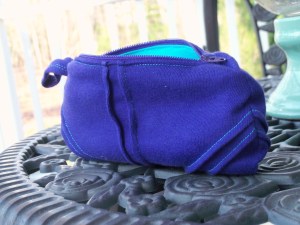
So, I am going to offer a choice between the purple dress and pouch, or the oversized beach bag pictured below with surprise goodies inside. The beach bag was made from a vintage curtain panel.

I am updating the Post about the Japan Quake Appeal to reflect this change. Please see the post to enter. Thanks!

Oh, and I will have a post in a few days about a new project I’ve been working on.

Posted in accessories, bag, diy, giveaway, purse, recycled, retro, vintage | Tagged , , , , , , , , | Leave a comment

Japan Quake Appeal Raffle- Closed

Japan has been in my thoughts and prayers over this past week, and I wanted to help in some way, even if small.

So, I’m offering a choice of either a dress and matching pouch or a giant beach bag with surprise goodies up for a raffle/giveaway to help raise donations for disaster relief in Japan. I’m joining with several other bloggers, in cooperation with A Bit of This and a Bit of That.

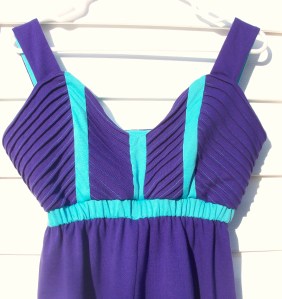
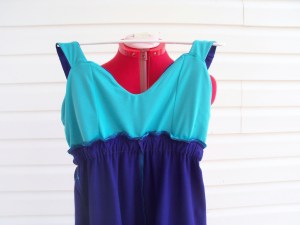
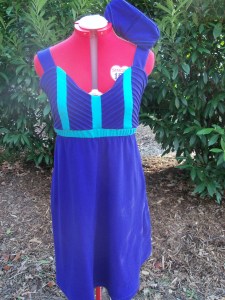
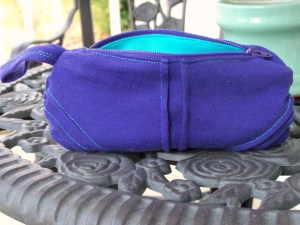
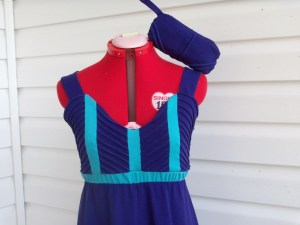
The winner of the raffle will have a choice between a purple and blue knit dress with a little matching pouch, or an over-sized, green polka-dotted beach bag with surprise goodies inside. The details about how to enter follow the pictures and description.

Option #1: An over-sized beach bag with surprise goodies


The bag will be have surprise goodies inside. 🙂

The bag is 17" tall (not including straps) and 21" wide

I made the bag from a vintage curtain panel


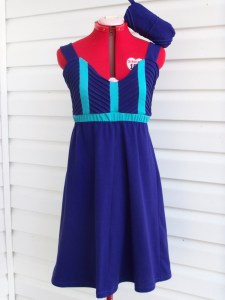
Option #2: The purple dress and pouch

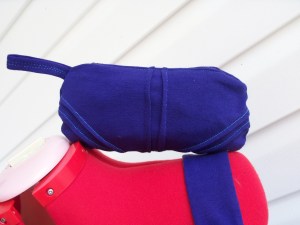
I made the dress and the pouch from recycled materials using my own designs and patterns. The color combination is one of my favorites.

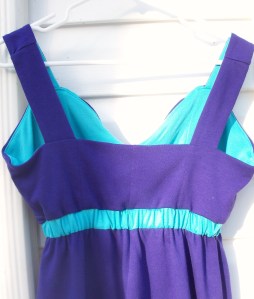
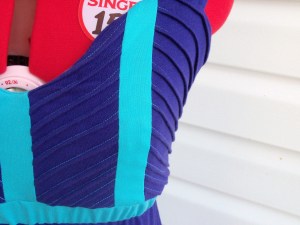
The dress is made from purple and blue knit materials. The pintucks are stitched with a contrasting blue thread (the same color as the accent pieces and bodice lining).


The inside of the dress

All of the dress seams are serged for durability. The dress is stretchy, with elastic in the casing at the waistband. I tried to make it in such a way that it could potentially fit from a small to a large. So, it will fit a size medium best, and fit a size small loosely.

Approximate measurements with dress lying flat and unstretched: bust-17.5”, waist-13.5”, hips-free, length-35”

How to Enter:

– Go to GlobalGiving* and make a donation.

To donate in dollars, please visit this link: http://www.globalgiving.org/

To donate in pounds, use this link: http://www.globalgiving.co.uk/

-Each donation of $5 or 3 pounds entitles you to an entry in the raffle.

-If you’re in US, you can also text JAPAN to 50555 to donate $10 (there is no receipt # for this. So please state in the comment that you’ve made the text donation).

-If there is another group you would like to make your donation through, just let me know in your comment what you’ve done, and provide a receipt # or something to that affect.

-Comment on this post with your receipt number (and/or organization donated to) and fill in a valid email address in the email address section of the comment form/box (so that I can notify the winner). If you don’t see the place to enter your email, you can simply put it in your comment. Once you do this, your name will be entered into the raffle to win this dress and pouch or beach bag with goodies.

-Multiple entries are allowed, but please provide a new receipt number each time.

-The raffle will close at 10:00 pm United States EST on Friday March 25th.

-I will choose the winner at random, and contact them by email to find out which option they’d like to choose and get a mailing address.

Even if the dress or beach bag is not your style or size, maybe you know a family member or friend who would like it. And, If you don’t want to win, I would still encourage you to consider participating. Most of us have $10 to spare.

Please help spread the word about this raffle and/or any of the other raffles being hosted.

A Bit of this and a Bit of That will have a list up on March 19 of all of the raffles being offered up by bloggers around the world.

For those interested, I will probably post about the process of making this dress within the next few days.

*We are in no way affiliated with global giving, that’s just our chosen method of getting funds safely to the affected area.

Posted in accessories, bag, clothing, diy, dress, giveaway, recycled, sewing, upcycled | Tagged , , , , , , , , , , , , , , | 7 Comments

The Sound of Music Dress

Some of you may recall a post that I wrote about The Sound of Music last summer (See it here, if you’d like). At the end of the post, I made a remark about the possibility of a future dress inspired by the dress in the picture below.

I love this dress–just as I love the majority of the dresses that Julie Andrews wears in the film. I wasn’t sure if I would ever find the right material for the dress, but readers, a couple of weeks ago I found it!

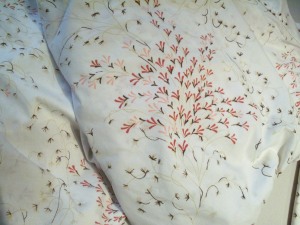
I was at the thrift store, and I was digging around in a bargain bin. At the bottom, I came across these vintage sheets. They were in wonderful condition, no stains, no weird smells, etc.
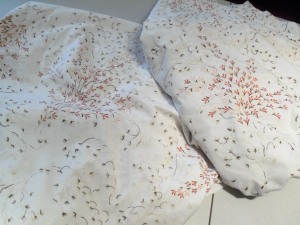
The print automatically made me think of the dress in the above picture. I stood there for a few short moments in amazement, thinking about how perfect this material was. Once I envisioned what it would be, I couldn’t have snatched the material any faster. A lady at the thrift store gave me one of the strangest looks I’ve ever been graced with.
Anyway, I got the material home and began designing the dress in my head. I didn’t want a contrasting bodice fabric for my dress, and I wanted much shorter sleeves.

I’ve wanted to make a dress with some pintuck pleats for a while. I like the look of them, and I thought it would add a nice detail to the bodice since I wasn’t going to use a contrasting material.

I found this pattern in the May 2009 addition of Burda magazine.
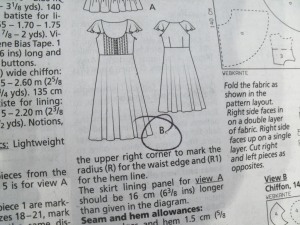
I decided to use just the bodice portion of the pattern, and create a fuller skirt with 4 panels, rather than the flounce skirt with only front and back pieces.
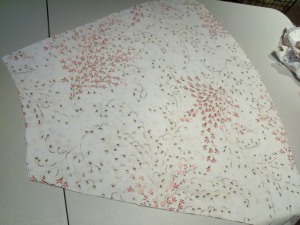
The back skirt panels cut out

I traced the pattern from Burda magazine and added the seam allowances.
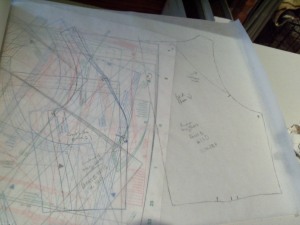
This particular pattern was in petite sizing. Something I was pretty happy about, because I didn’t think I would need to shorten the bodice or make any other adjustments.

One problem that I always have with Burda patterns is the sizing. So, I decided to go with the size according to my waist measurement. Normally, I would use a larger size at the bust and hips, because my bust and hips are usually at least one size up according to the measurements. However, every time I trace the pattern according to those measurements, I end up having to take it in significantly.

Anyway, enough grumbling, I figured it out (although, the sizing was still a bit off in the end). Once I had my pattern pieces I cut the bodice pieces and the lining.

I sewed the darts on the bodice back, and pressed and sewed all of the pintucks on the front pieces.
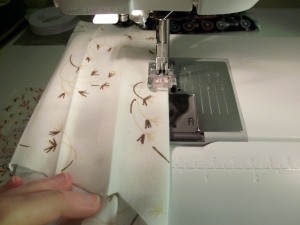
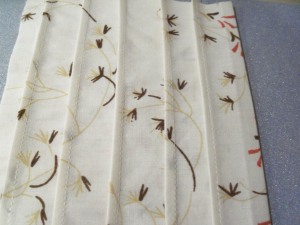
Then, I attached the side front pieces to the front pieces, and sewed the bodice together at one side and at the shoulders.
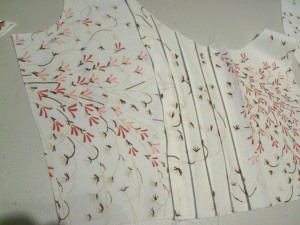
I also cut out and finished the edges of those flutter cap sleeves that you can see in the technical drawing for the pattern.
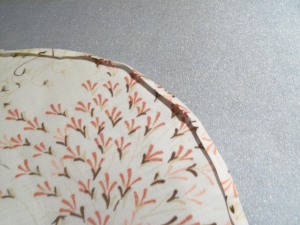
Once I pinned them to the bodice and held the bodice on, I absolutely hated how they looked. It just wasn’t the style for me. They sat in a weird place that made my shoulders look strange. Anything that makes my shoulders appear narrower tends to make me look extremely disproportional.

With spring beginning to make an appearance, I decided that a sleeveless dress would be a nice option. Plus, it would work well with a cute little cardigan.

The sleeve material won’t go to waste. I’ll use it for another project. I only used one sheet for the dress, even though I had to cut strips on the bias to make some bias tape for the armholes. I also originally cut out one of my pieces at the only spot where there was damage to the material: an ink blot.
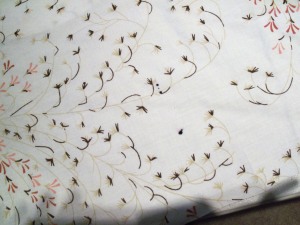
Despite that, I didn’t even have to cut into the second sheet. By the way, I bought both of these sheets for only about $1!

Back to the dress construction….I sewed the seams of the skirt, except for the seam where the invisible zipper would go.

There were self-facings on the center front pieces. So, I only had to cut the side front and back bodice pieces for the lining. I sewed the side front pieces to the self-facings, and sewed the bodice together at the shoulders and side seams. Then, I sewed the lining to the bodice, right sides together at the neckline. After that, I pressed and basted around the bottom (to hold everything in place when I attached the skirt to the bodice).
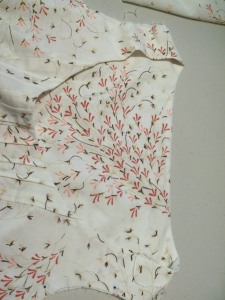
I attached the skirt and the bodice, serged the seam (as I did most of the seams in the dress), and pressed it down.
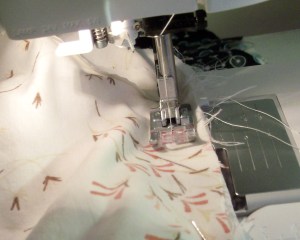
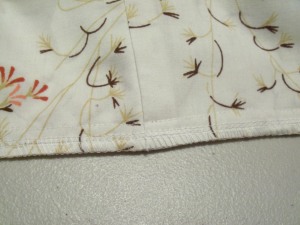
I inserted the invisible zipper.

The end was so close I could already feel the satisfaction of the finished product… and that’s when things went all wrong.

As I was zipping the zipper up after finishing sewing it in, it broke!
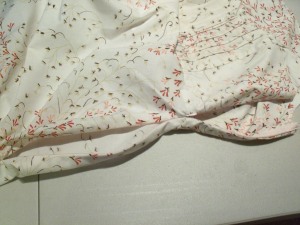
It worked fine before I sewed it into the dress, but as soon as I had finished all of the hard work, it gave out. The thought of having to rip the zipper out and start all over again was sickening.

This was me when I realized there was nothing left to do, but spend an hour with my seam ripper. Ugh!
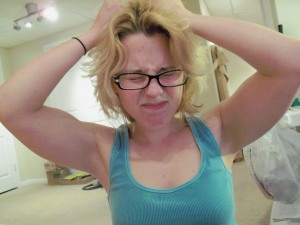
This picture doesn’t begin to express the agony I was in.

Once I had finally removed the “zipper that couldn’t,”
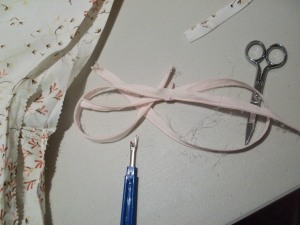
I set to work adding the new and (hopefully) functioning zipper. The new zipper works beautifully, for now.

With the bias tape sewn in at the armholes, I folded and hand sewed it down to the lining.
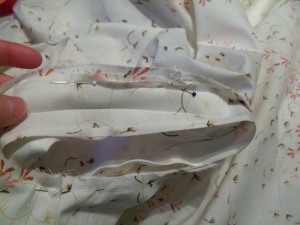
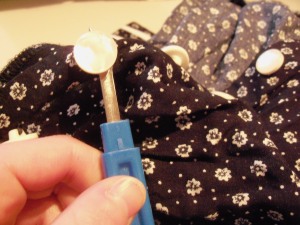
I needed several buttons, and I couldn’t find any that I thought would work well for the dress. So, I went digging in my to-be-reconstructed pile. I found a dress with these pearly buttons all the way down the front. There were so many of them, I knew it wouldn’t be a problem to steal some for this project.
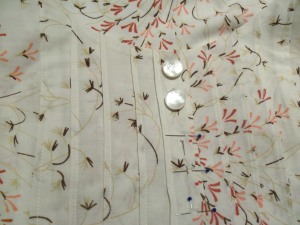
I hand-stitched the six buttons on, and stitched the placket together between the buttons. Since, the buttonholes weren’t really necessary and I didn’t have buttons small enough, I just decided to skip that step.
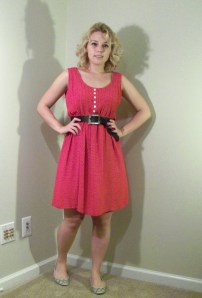
With the bottom of the dress hemmed, the dress was ready for an enjoyable spring day.
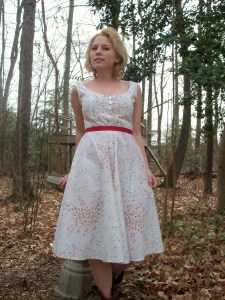
It can be worn with a coordinating ribbon or belt. The outfit will be complete when I have a suitable cardigan.
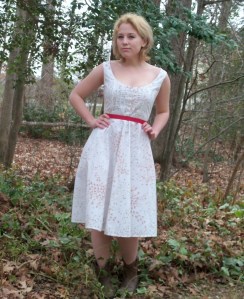
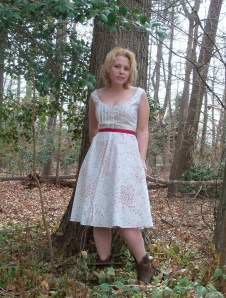
The dress can be worn without a belt as well.
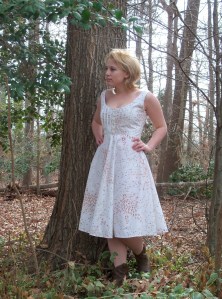
I am not comfortable with dresses this low cut, and I couldn’t tell from the magazine that the neckline was going to be so low. The low neckline is the reason that I took my first set of pictures below with the brown tank underneath.
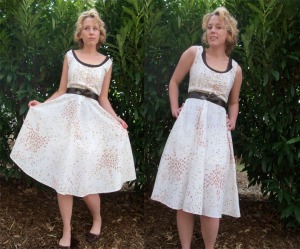
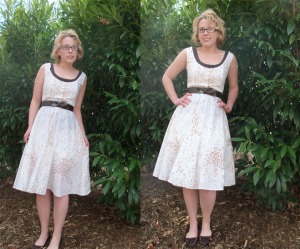
I think it detracts from the whole look. I figured that because this was a petite size and I went a size down, I would have no problem with this pattern. Oh well, I’m not about to take it apart. 😛 Maybe I can find a pretty lacy camisole to wear underneath it. Ideally, a red or pink camisole would be best, to match the flowers in the print and allow me to wear a matching ribbon or belt.
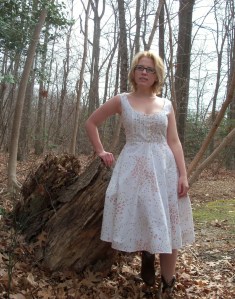
I kept the length longer than I usually do, because it seemed to fit this particular dress.

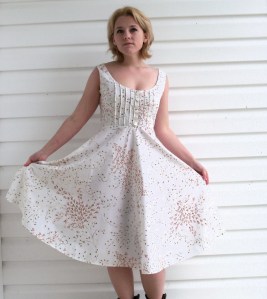
Here’s a detail shot of the bodice front.

These pictures show the colors of the dress the best.
I also had to take a picture sitting, in order to semi-mimic the inspiration photo.
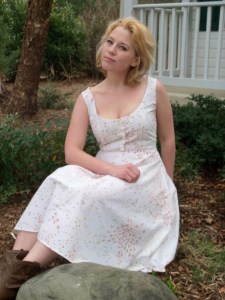
Sorry for the onslaught of pictures. 🙂 I just love this dress!

Posted in clothing, diy, dress, fabric, fashion, recycled, redo, repurposed, retro, sewing, thrifted, upcycled, vintage | Tagged , , , , , , , , , , , , , , , , , , | 36 Comments

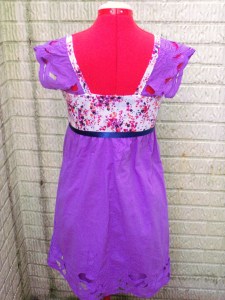
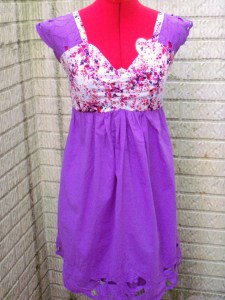
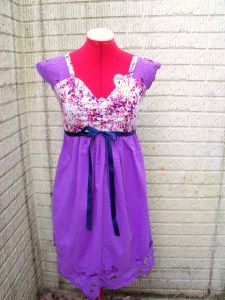
Purple floral dress for my sister

My new sewing machine and I are getting along swimmingly. Oh, we’ve had our share of misunderstandings this first week, but new relationships always require work. 😉 Learning the particulars of a new machine hasn’t allowed me to get too much sewing done this week. However, I do have a dress to share with you, and another on the way.

My youngest sister recently requested that I make her another item of clothing: a dress this time. I obviously couldn’t turn her down, because she is the baby of the family. As many of you surely know, the youngest child/baby/fledgling in the family tends to get whatever they want. 😉

Anyway, I love her and my other three younger sisters to pieces, and I’ve been missing them terribly since moving. So, this was a great way to feel close to them. Even though this dress was only for my youngest sister, making it reminded me of my whole family.

Enough talk about me, let’s move on to the dress.

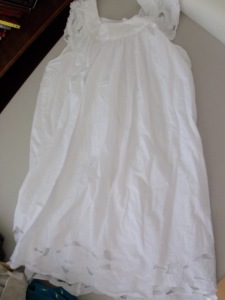
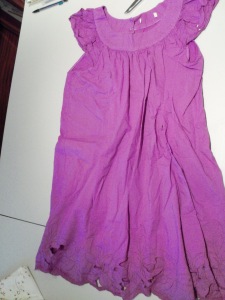
The dress started out as this big white sack, with cute embroidery and cut outs at the hem and sleeves. I guess it may have been a mini dress, or a tunic. To me, it just seemed really frumpy. It reminded me of a muumuu, except for the length.

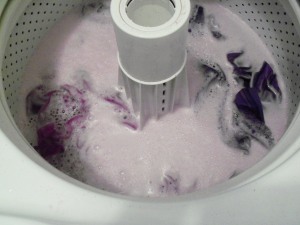
I found the dress many months ago, and dyed it, back when I created my Purple Parade Dress for the Burdastyle Remake Challenge.

The dress in the dye bath with the robe that I reconstructed.

If you don’t recall the dress that I’m talking about, here’s a picture of it:

BurdaStyle Remake Challenge dress

Anyway, I set the dress aside and just pulled it out about a week ago.

The dress in its purple form

My sister loves purple, and I thought I would use parts of this dress for her new dress. I don’t have step-by-step pictures of the process, but I do have a few.

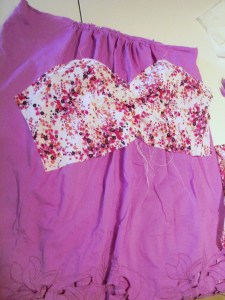
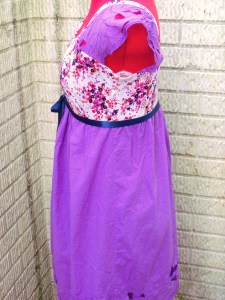
I used most of the dress to create the skirt, cutting it just under the neckline trim. I just re-basted the gathers after cutting the skirt, and stitched the lining and outer skirt back together.

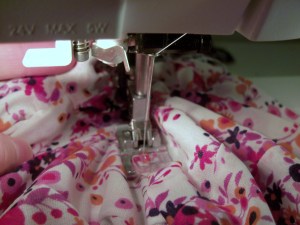
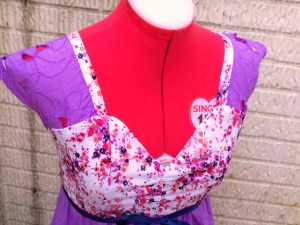
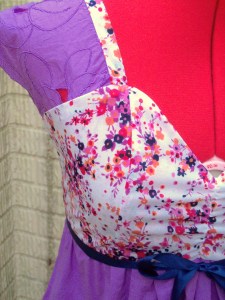
For the bodice, I used a sweet white floral knit. There are various shades of purple, pink and peach in the print. Originally when I drafted the pattern, I didn’t plan on gathering in the center of the bust. However, I think it really gives the bodice a cuter shape.

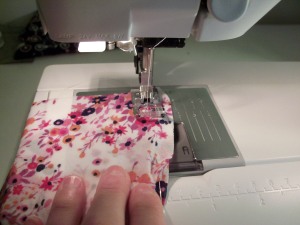
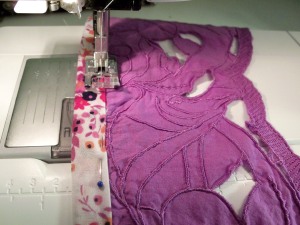
I made little bias strips with the floral knit to trim the raw edge of the old straps. The bias looks much nicer than a simple fold-and-sew edge would have, and it ties the pieces of the dress together better.

The bodice is completely lined with more of the floral material, and the straps are sewn in between the bodice and the lining. After I attached the bodice and lining together, I sewed the lining to the seam allowance (this ensures that the lining stays in place on the inside of the dress).

Once I had finished the bodice, I sewed the bodice and skirt together and added some elastic at the seam. The seams of the dress are all serged for more durability and stretch.

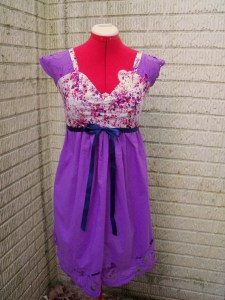
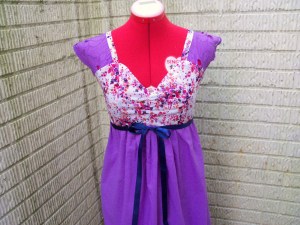
Here is the completed dress.

I wasn’t feeling up to taking pictures today, so I just took some photos of the dress on the dress form. I hope you can forgive me for not wanting to get all dolled up.

I am really happy with the way it turned out, and I think my sister will like it.

Posted in clothing, diy, dress, fashion, recycled, redo, repurposed, sewing, upcycled | Tagged , , , , , , , , , , | 5 Comments

Reconstructions, Sewing Machine and Iron

It has been an eventful and thrilling week. I have a variety of items and some news to share with you.

Custom Reconstructions

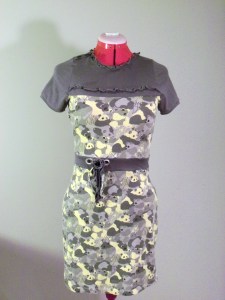
I wanted to show some reconstructions that I just finished for a gal on Etsy. She sent the dresses to me and gave me complete creative license to transform them. The only requirements were that the tops of the dresses be made from stretch knit materials, and that the dresses have a waistline.

Here is what two of the dresses looked like before.

I don’t have a before picture for the one with the panda print, but it was just a basic spaghetti strap, straight tank dress.

Anyway, here are the after pictures. There were a few finishing touches that still needed to be done when I took the pictures. So, if you see any strings hanging, etc, that’s why.


This one has such a fun, retro feel to it. I love it!

Sewing Machine

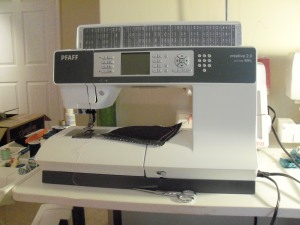
My new sewing machine arrived in the mail yesterday, and she is one of the loveliest things I have ever seen. She sews with fervor, she is a beast of a machine (exactly what I needed), and I think I’m in love.

I have been saving up for a new machine for a while. I needed an upgrade because of the amount of sewing that I do. Originally, I was going to purchase a Pfaff Expression 2.0, but I missed my chance on the only one listed anywhere online (it was on eBay). Anyway, I found this gal on eBay too. The machine is a Creative 2.0, without the embroidery unit. I can’t believe what a great deal I got on this machine; eBay is one of the best inventions, ever.

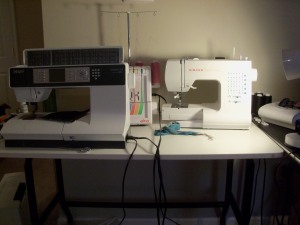
Look at the size difference between the machines! The work space on the Pfaff is outstanding.
The reason I wanted to purchase a Pfaff is because they are solid machines. They also have IDT (Integrated Dual Transport), which makes for a smooth and even feed of whatever fabric you’re working with. There is a built in walking foot that snaps down behind the foot, and the fabric is pulled evenly from both the top and the bottom.

One of my biggest struggles has been sewing knits on my old machine. No matter what I do, the tension is never right and the fabric jams easily in the dogs. Well, this machine pulls knits through with no problems and the stitches are perfect! Not only that, it automatically back stitches, ties off and cuts the threads. 😀
I was so excited after I tested my first few sets of fabric swatches on this machine that there was actually adrenaline pulsing through me.

Yep, I’ve got some real issues, but it’s not that bad, right?

It’s not like I’m a crazy cat lady, or something?

OK, so maybe there are some similarities. I do hope to one day have a large collection of machines to take care of, and I would rather stay home and play with my machines then go out, or watch TV.

I have yet to name this new pet, but once I do I’m sure it’ll slip into a post somewhere.

It is sad to put my little Singer in the backseat. She has gotten me through many projects. We’ve had moments of joy and satisfaction, moments of defeat and frustration, and moments of complacency and indifference. Through it all, she has always been my trusty little sewing machine that could.

Alright that’s enough of my “Ode to Betsy.” She will still get attention here and there, believe me. She definitely still has her uses.

Pressure Iron and Steamer

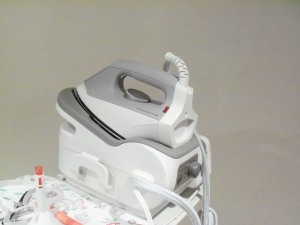
Yesterday was without question, one of the most exciting days of the year for me. I received not only my sewing machine, but the Rowenta Pressure Iron and Steamer that I won in the Burdastyle contest back in December.

This iron is beautiful, and I can see a long and fulfilling partnership ahead.

With the arrival of these two new toys, I may disappear into my temporary basement lair for a while.

House Update

We finally received an executed contract for the home we’re buying, last Friday. The house is a foreclosure, and we are purchasing it “as is.” It’s is a fixer-upper, which is what we wanted. There is a lot of work that needs to be done that we already know about and are ready to get our hands dirty to fix. But, we want to make sure that we have the opportunity to raise objections to anything that is too serious a problem for us.

That said, we were supposed to have the home inspection this week and raise any objections and/or back out of the contract within the time-frame the seller wanted. However, neither the seller nor the listing agent seems to be capable of figuring out when the property will be de-winterized. We’ve already had to reschedule the home inspection twice now. Yesterday we weren’t notified until half-hour before the inspection (by email, no less) that the property still wasn’t de-winterized.

Anyway, this just illustrates how frustrating the whole process has been. I know I haven’t given too many details, but the past several weeks we’ve been dealing with this same type of behavior. When we are done with this first-time home buying experience, we may well have tackled the worst home buying experience as well.

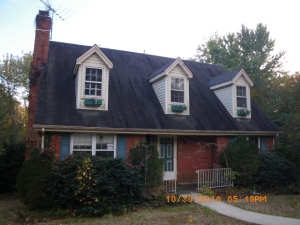
I wanted to at least share a picture of the front of the house with you. I’ll take more (of the inside, etc) whenever we have the home inspection.

As you can see, she is in need of some attention. I can’t wait until we can bathe and groom her. Haha!

Posted in clothing, diy, dress, fashion, recycled, redo, repurposed, retro, sewing, Uncategorized, upcycled | Tagged , , , , , , , , , , , , | 20 Comments